|

| |
|
Let
Us Know
How
did this activity work for your family?
Email us at:
|
 |
|
|
| What
to Do |
 |
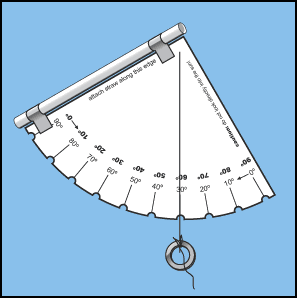
Print
out a copy of the astrolabe drawing.
|
 |
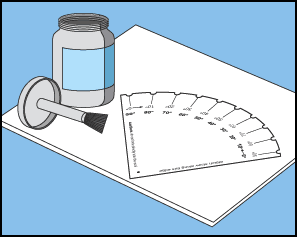
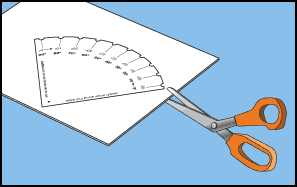
Glue
the copy of the astrolabe drawing to a piece of cardboard or file
folder. Cut the astrolabe out with scissors.
|
 |
Using
scissors or a paper hole-puncher, carefully make a small notch at
each of the lines marked along the curved edge of the astrolabe. These
notches will come in handy when you're measuring the angle between
two celestial objects and you have to hold the astrolabe horizontally. |
 |
Cut
a drinking straw to the same length as the sides of the astrolabe.
|
 |
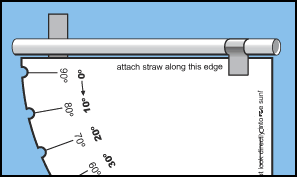
Tape
the drinking straw to the edge of the astrolabe marked "Attach
straw to this edge." Be careful to not tape the straw on the
astrolabe, but just on the edge.
|
 |
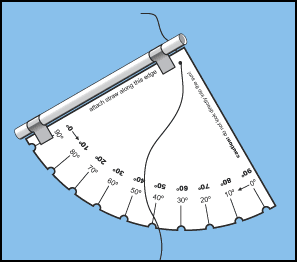
Carefully
poke a small hole through the astrolabe where the "X"
is marked, pass the string through it, and either knot the string
at the back of the cardboard or tape it there.
|
 |
Tie
the small weight to the opposite (front) end of the string as shown.
You have now constructed an astrolabe!
|
|
What's Going On
The
astrolabe was invented in Greece either by Hipparchus, a 2nd century
B.C. astronomer, or Apollonius of Perga, a 3rd century B.C. mathematician.
For many centuries, it was used by both astronomers and navigators,
and especially by the 15th century explorers who used it to determine
latitude, longitude, and time of day.
|
|
|
|
Activity
7: Making a Simple AstrolabeDerived from
"Making Measurements of Objects in the Sky": from Science
Resources for Schools: Doing Science, Vol 3, No. 1. Copyright
1985 by the American Association for the Advancement of Science
& the Smithsonian Institution.
|
|


